Background
RStudio is an Integrated Development Environment (IDE) developed by Posit for R programming language. It includes tools for script editing, R console output, data viewing, and plotting, making it easier for an analyst to explore, visualise, and conduct analysis on the data in a single environment.
What does it look like?
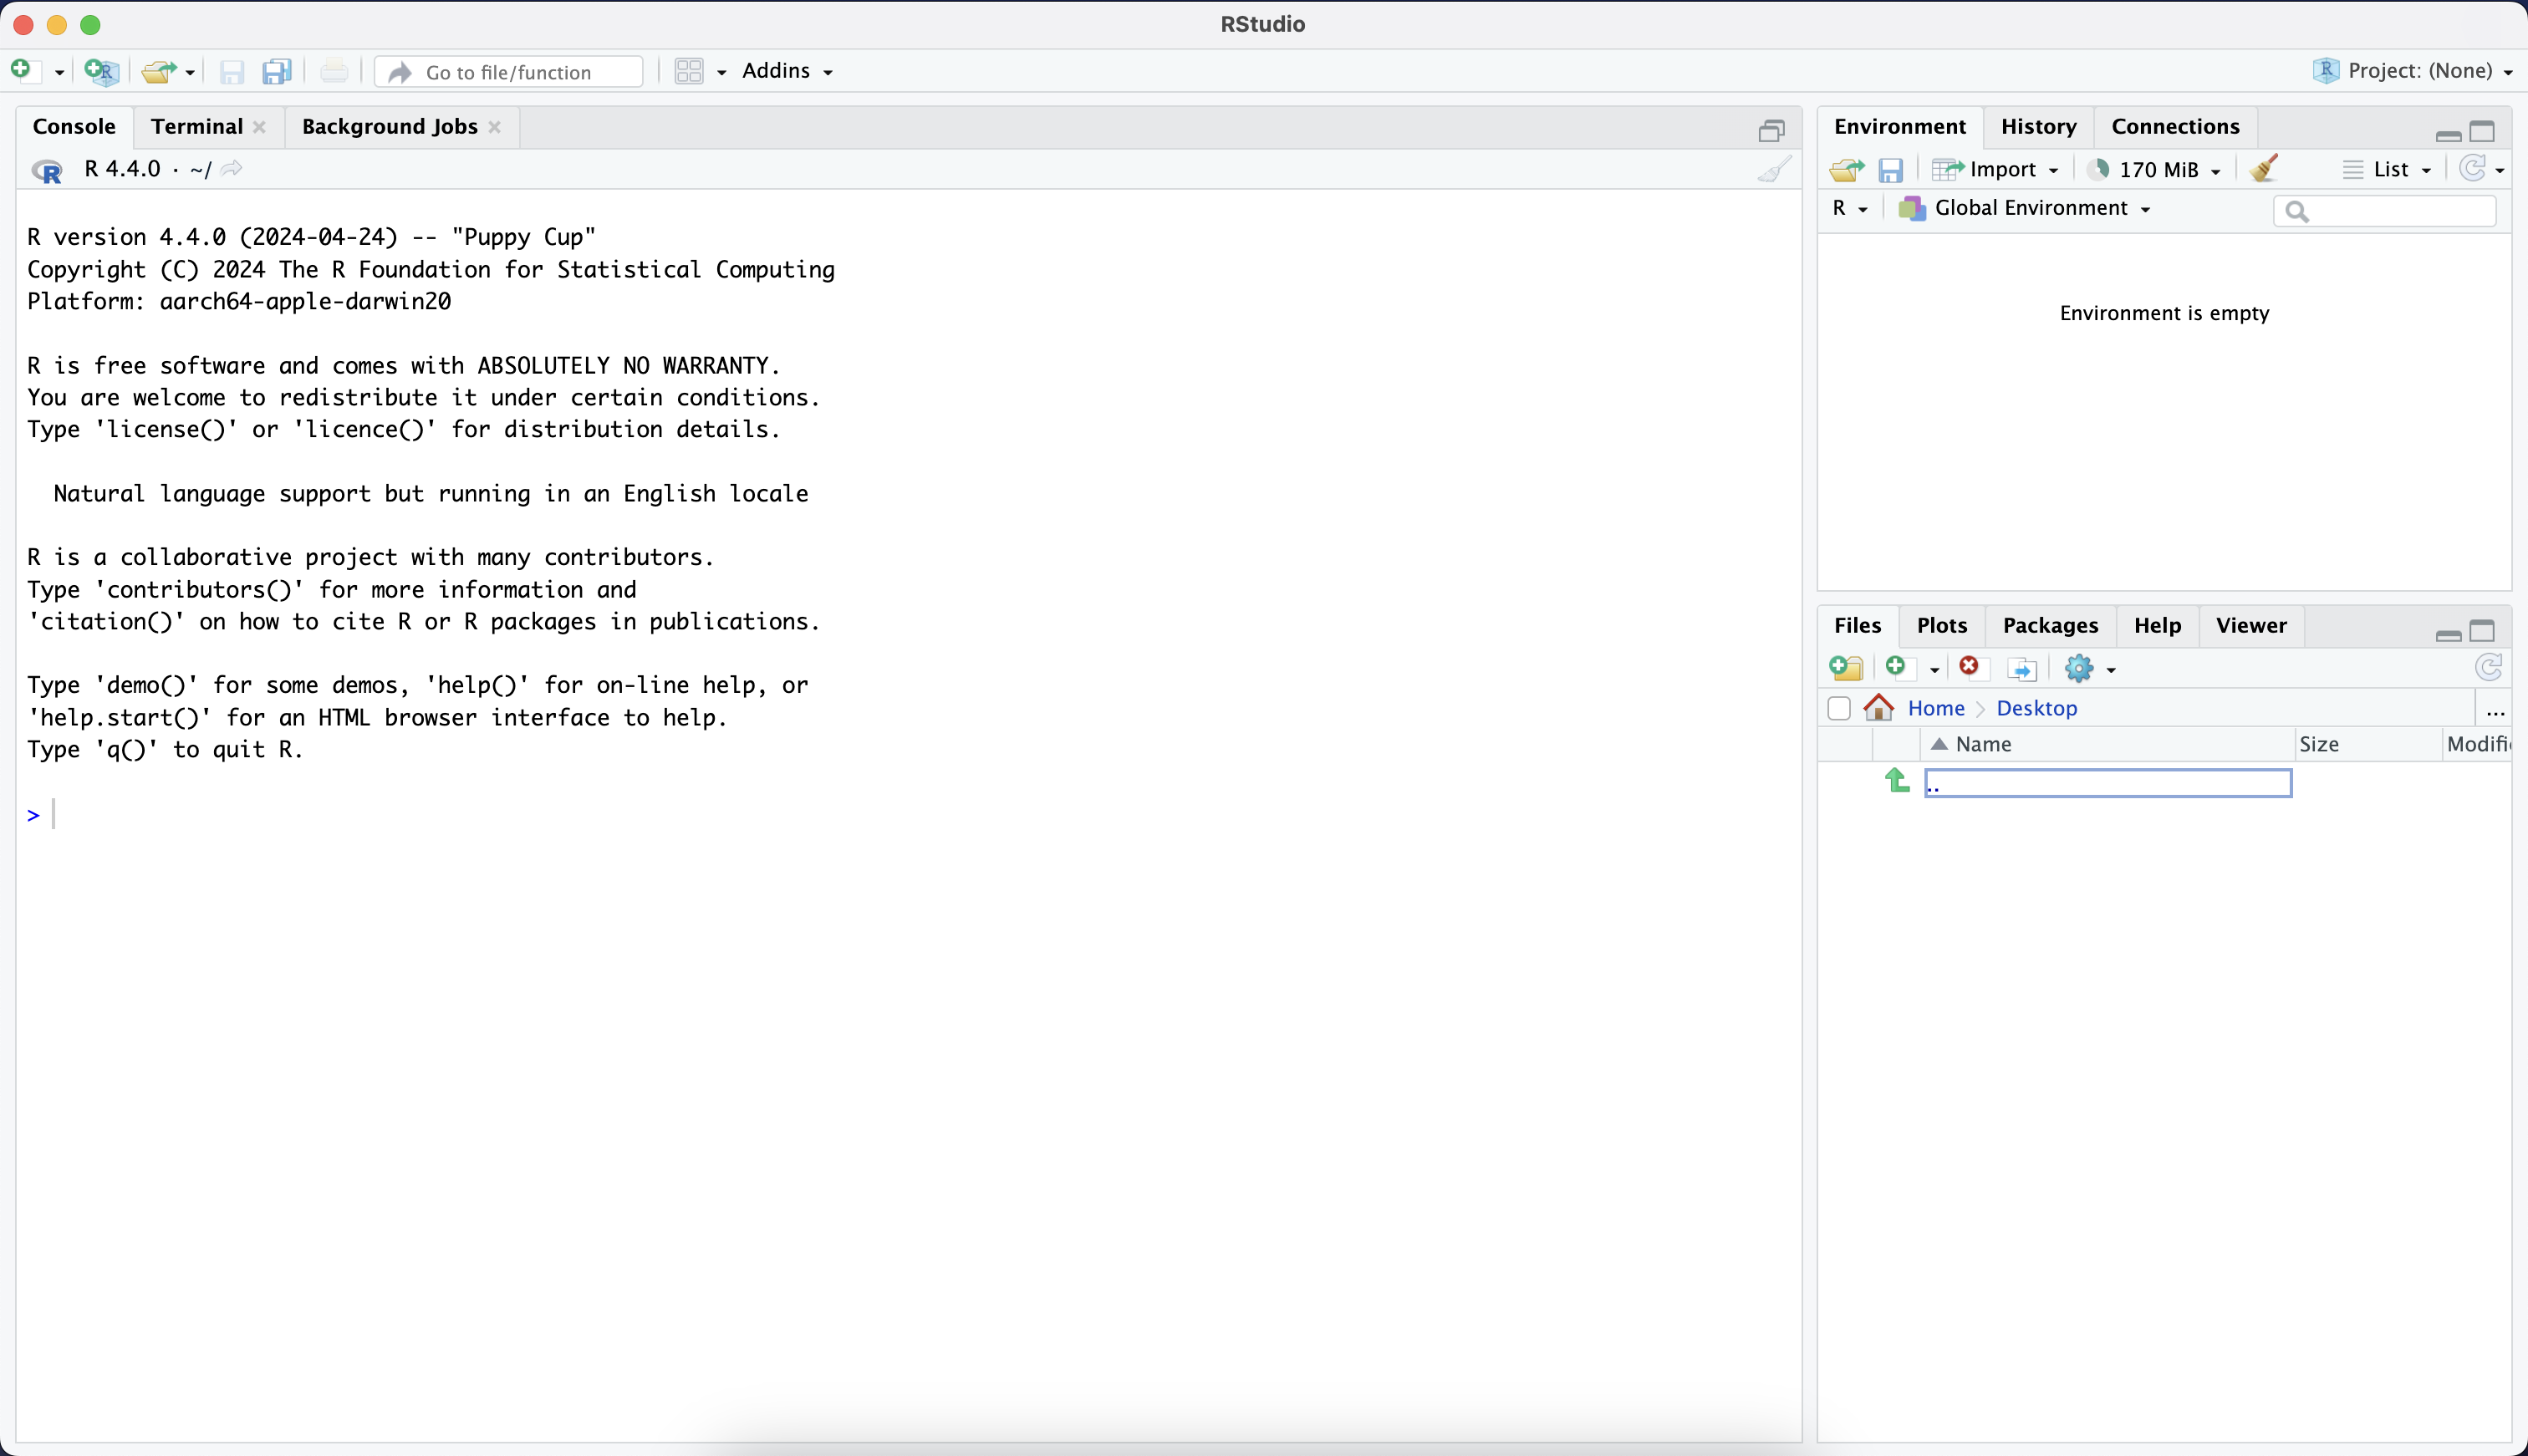
The default appearances of the RStudio user interface contains 4 primary panes:
- Source pane
- Console pane
- Environment pane
- Output pane
The first time you open the RStudio, you will be greeted by the three panes: console, environment, and output. We will talk about the Source pane later in the chapter.
On the top right-hand side, you have the Environment pane, which includes the Environment, History, Connections, Build, and Version Control System (VCS) tabs. We will focus on the Environment tab, which shows the currently saved R objects.
Output pane, located at the bottom-right of the app, is used to display various outputs such as plots, HTML content, or files directory. You can interact with it as well, not just for shows. For example, in the “Files” tab, you can add new folders, new blank files, delete/rename, and more.
On the left-hand side, you have the Console pane, which is the place where you can type out the command written in the R language and execute it immediately on your computer.
You can run the R code inside the Console, but once you close RStudio, you will lose all the code.
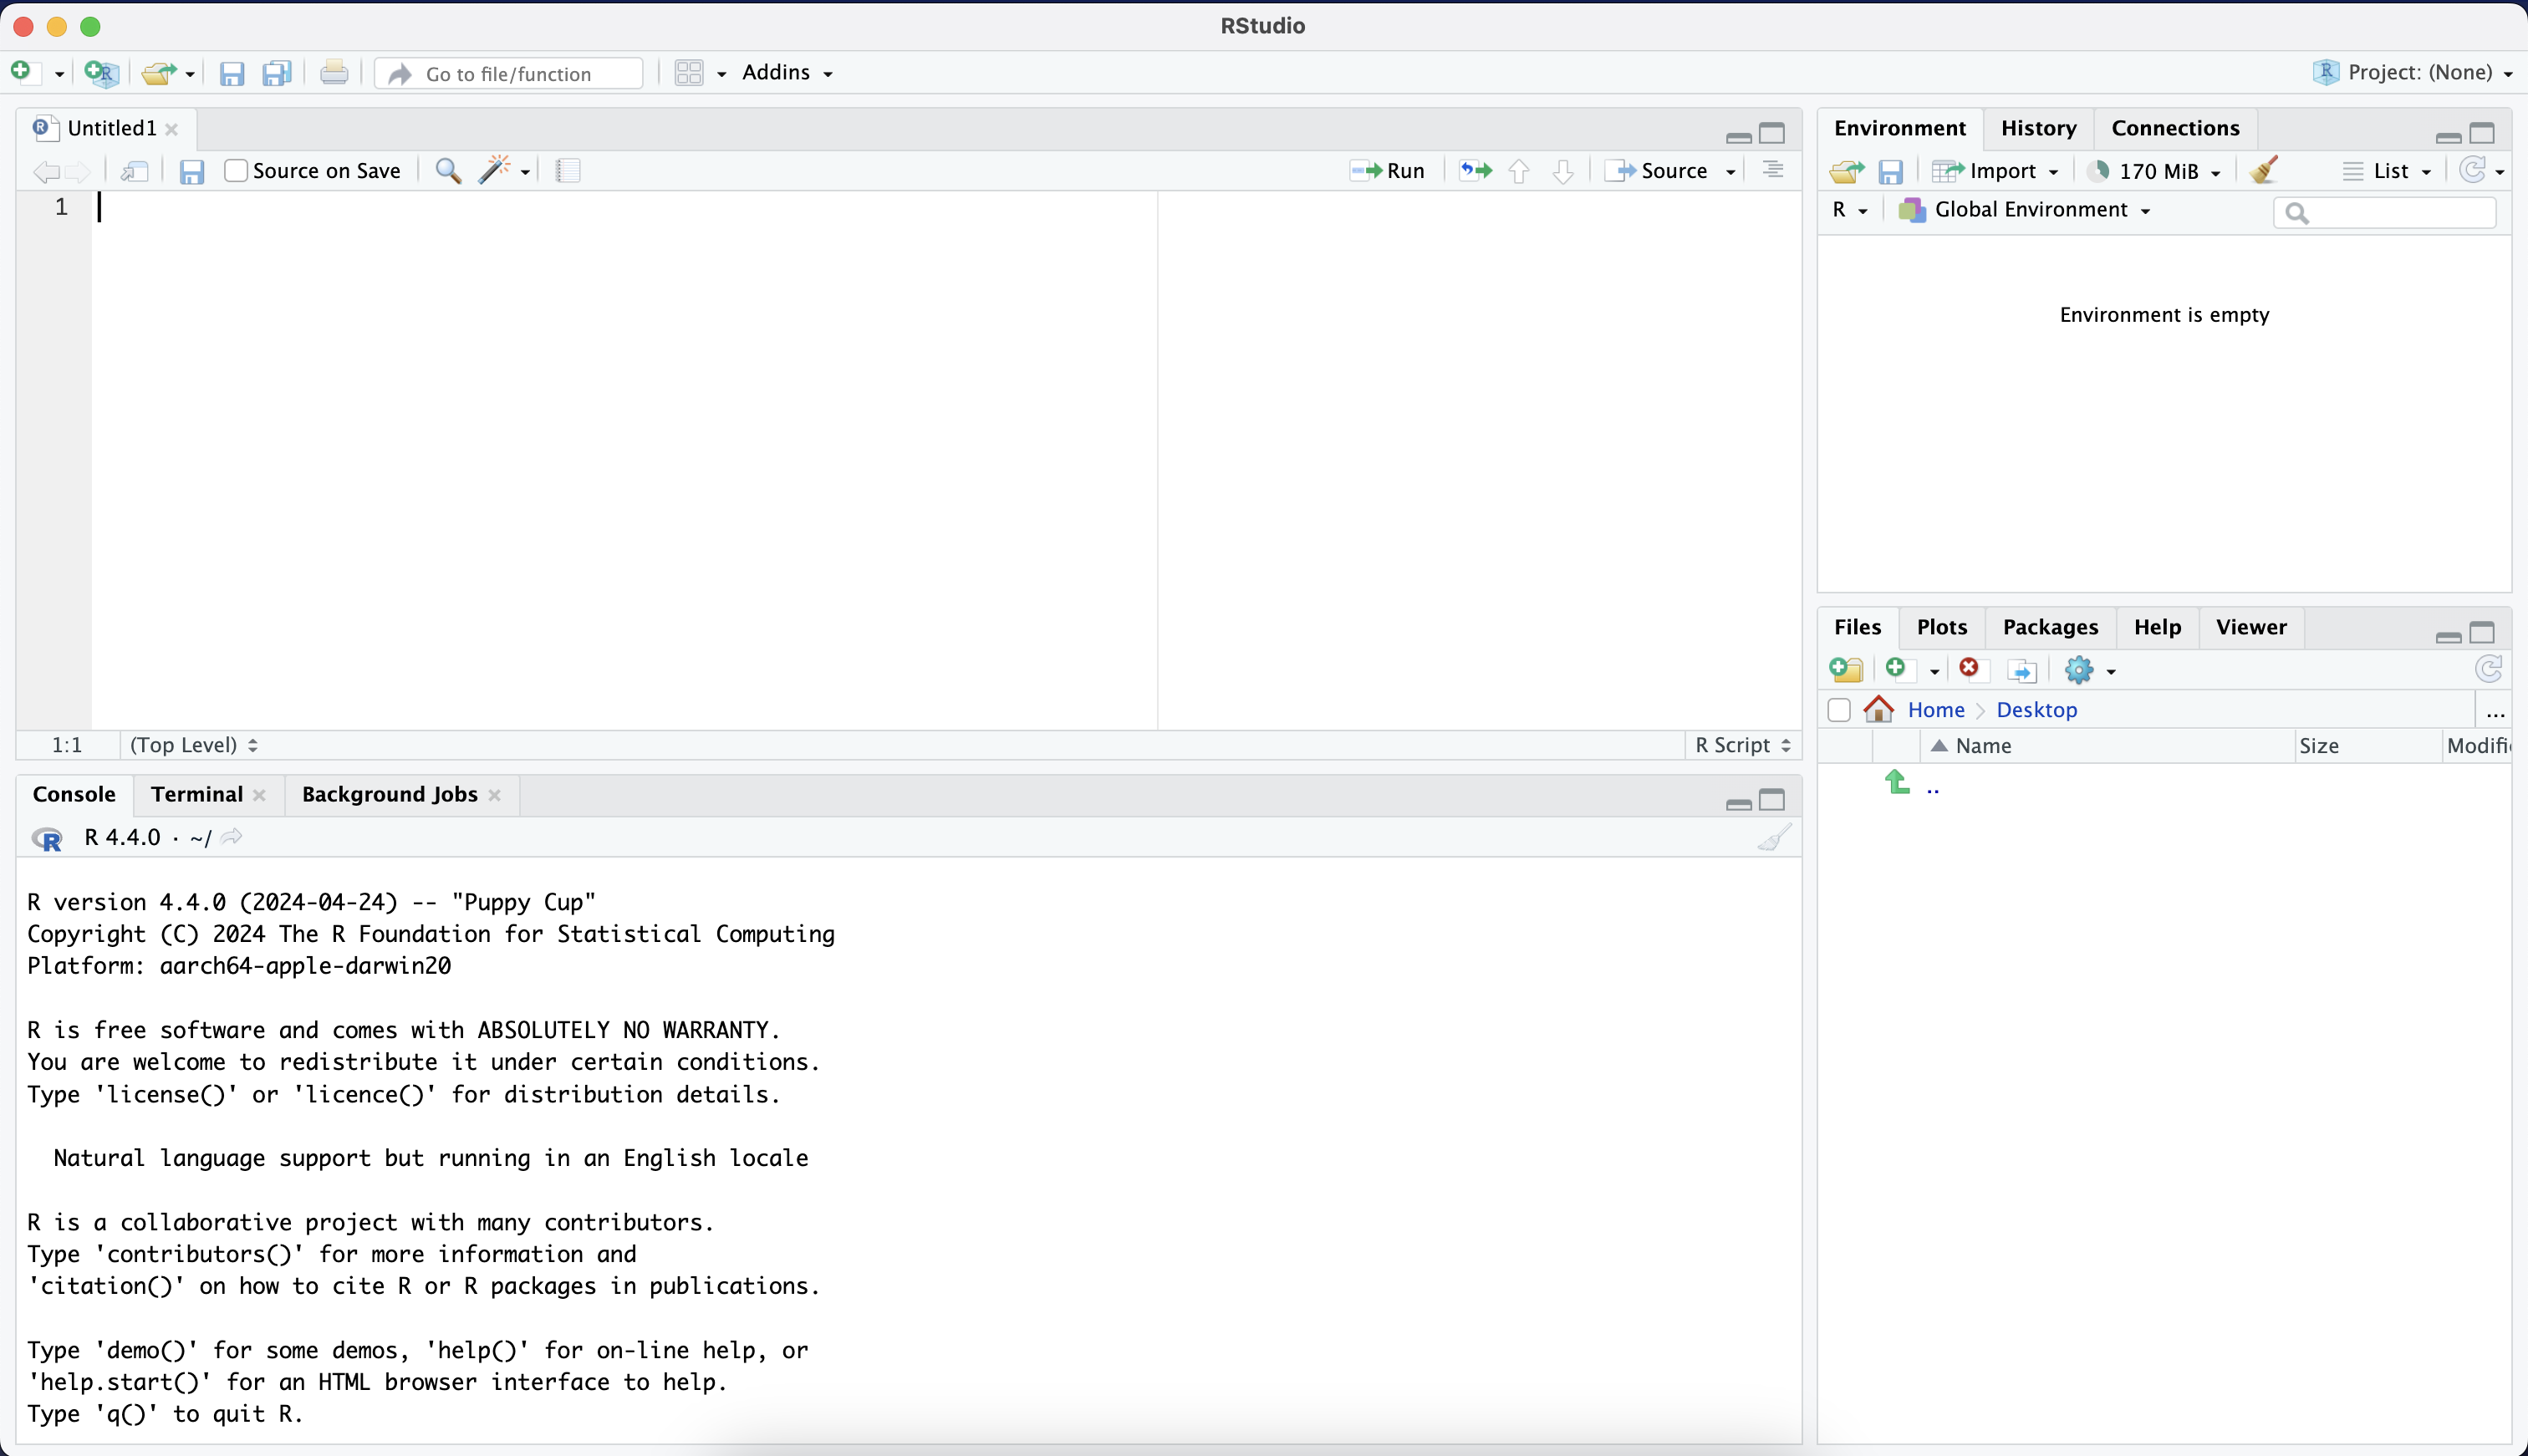
To make your work reproducible, you should write and store all the code in the R Script (.R). It will show up in the Source pane, allowing you to view and edit various code-related files.
R Script
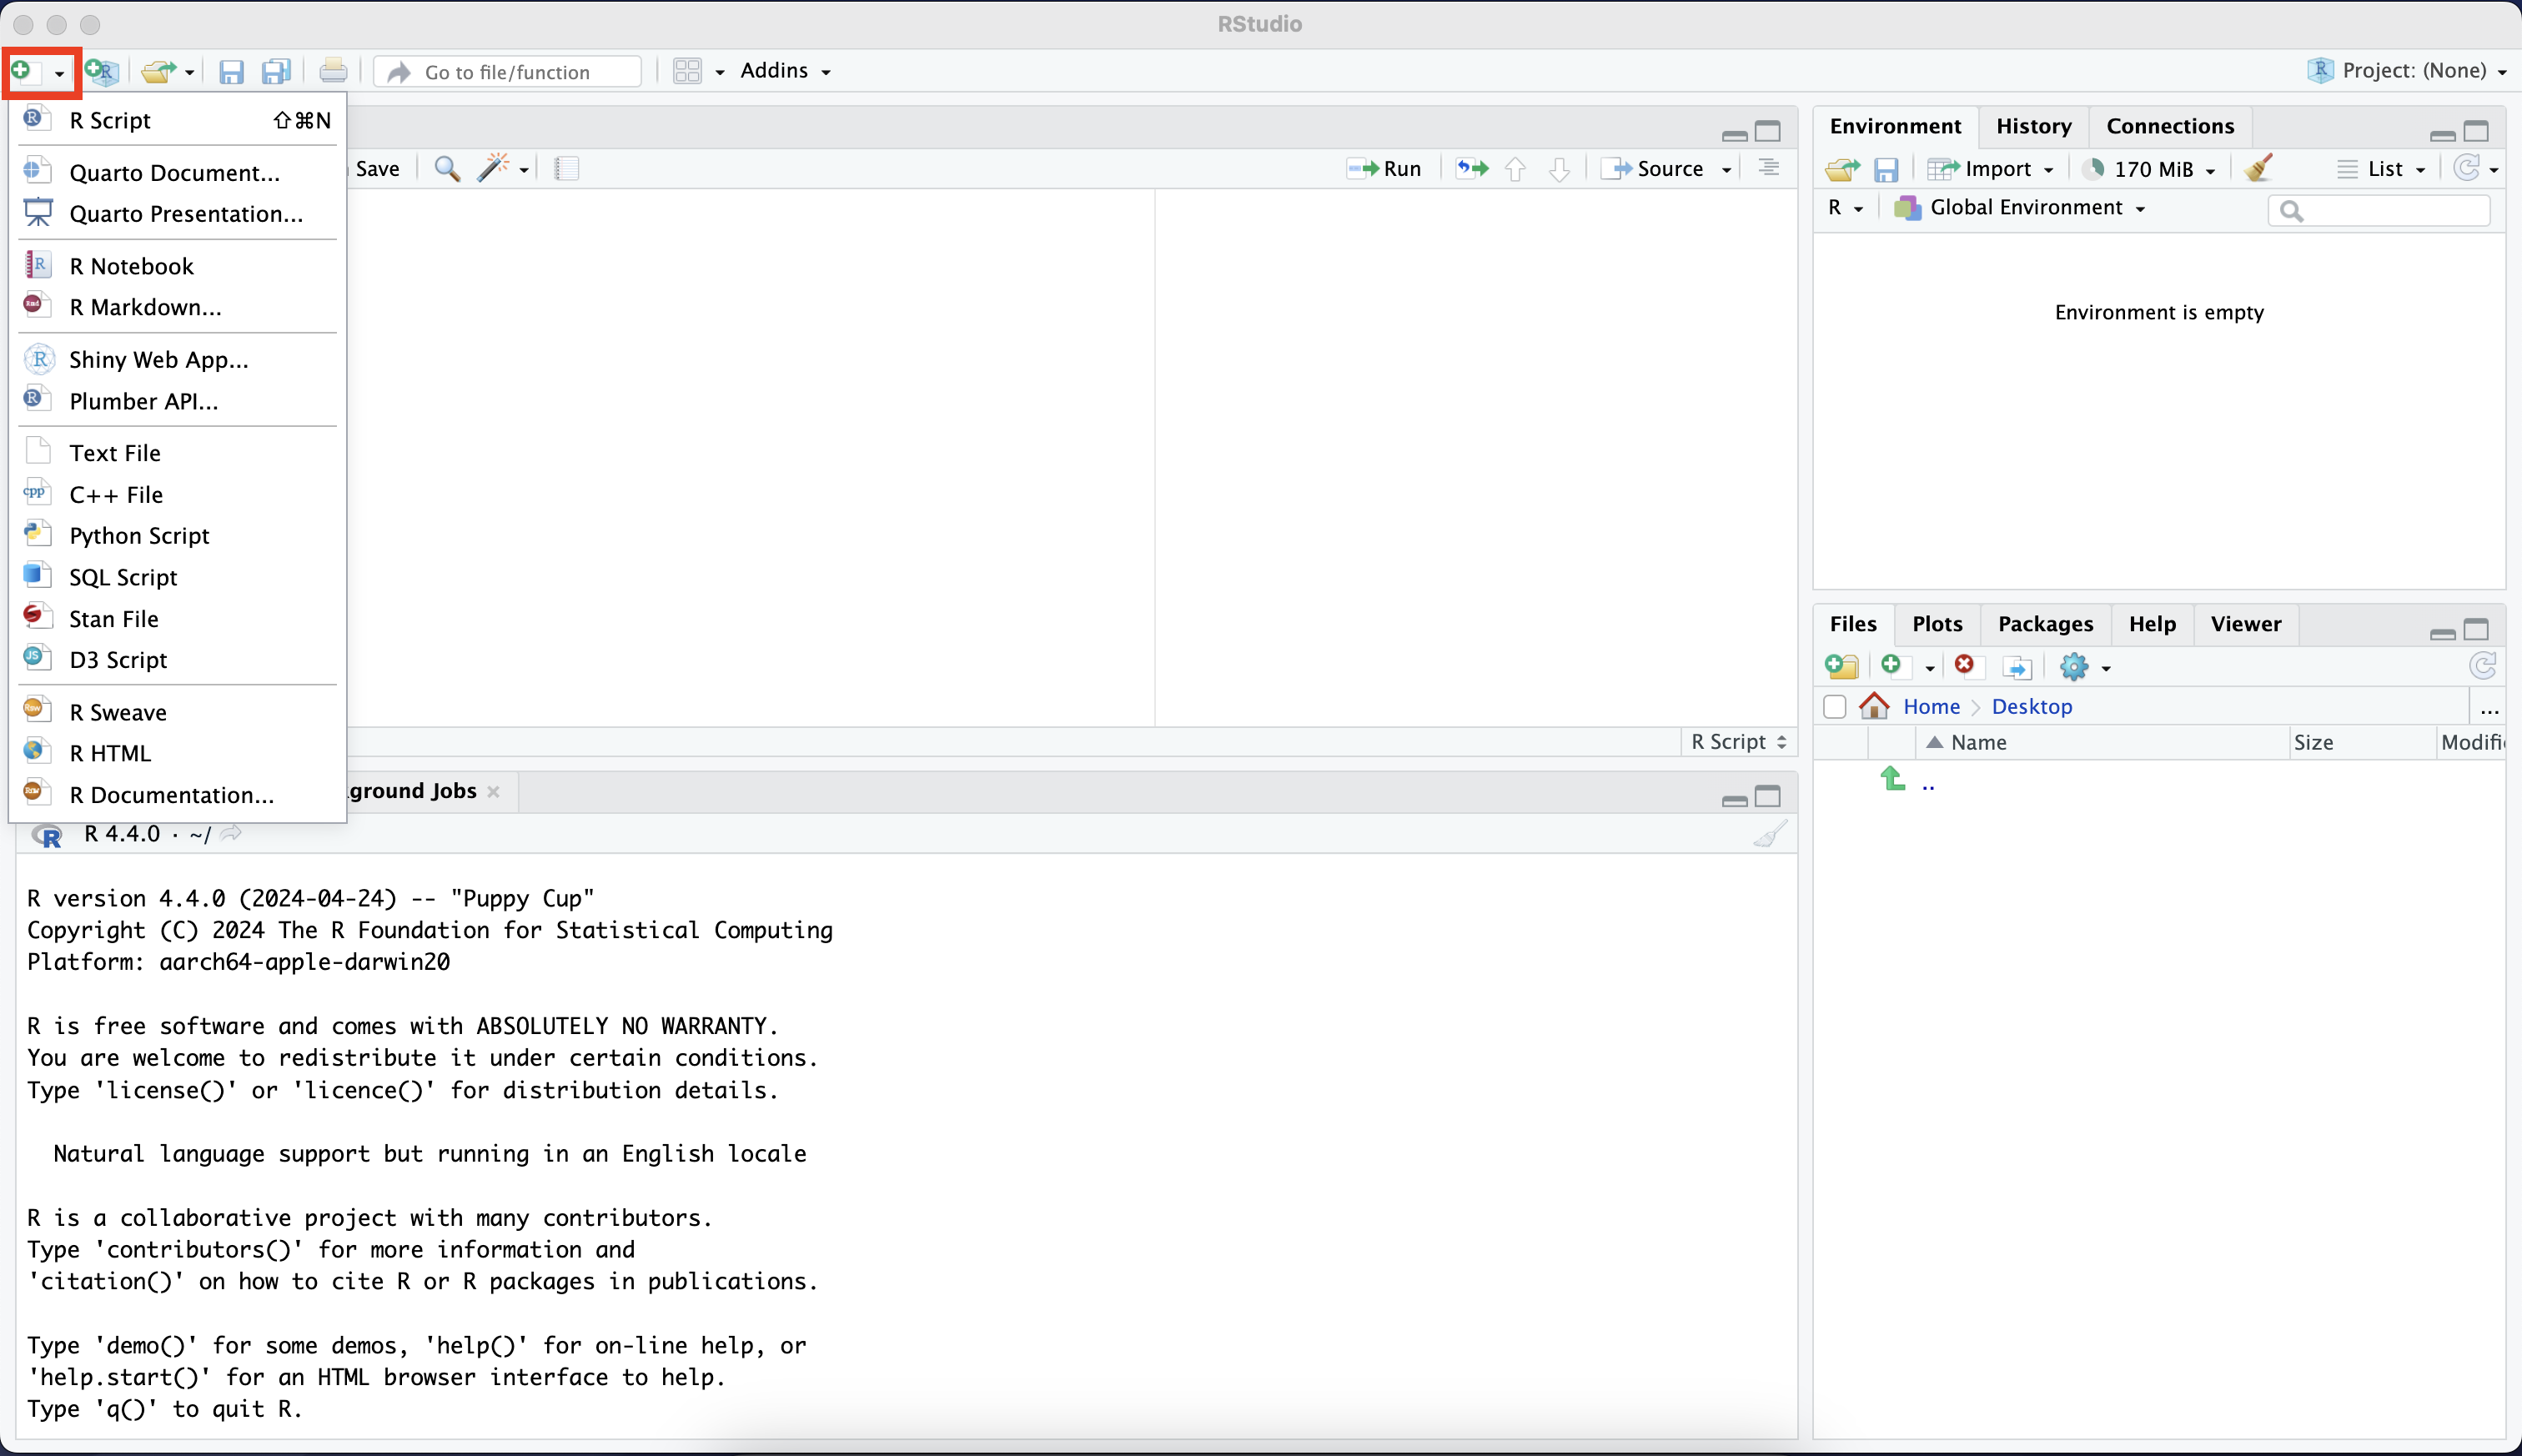
There are multiple ways of adding the R Script. To get started, click on the paper with a plus symbol and choose R Script.
In an R Script, you can write code and add comments. Also, you can run each line of code by pressing ctrl + enter/return on Windows and Linux or cmd + enter/return on Macs. The code messages will shown in the Console.
There is a shortcut key for creating a new R Script, which is ctrl + shift + N for Windows and Linux or cmd + shift + N for Macs.
R packages installation and loading
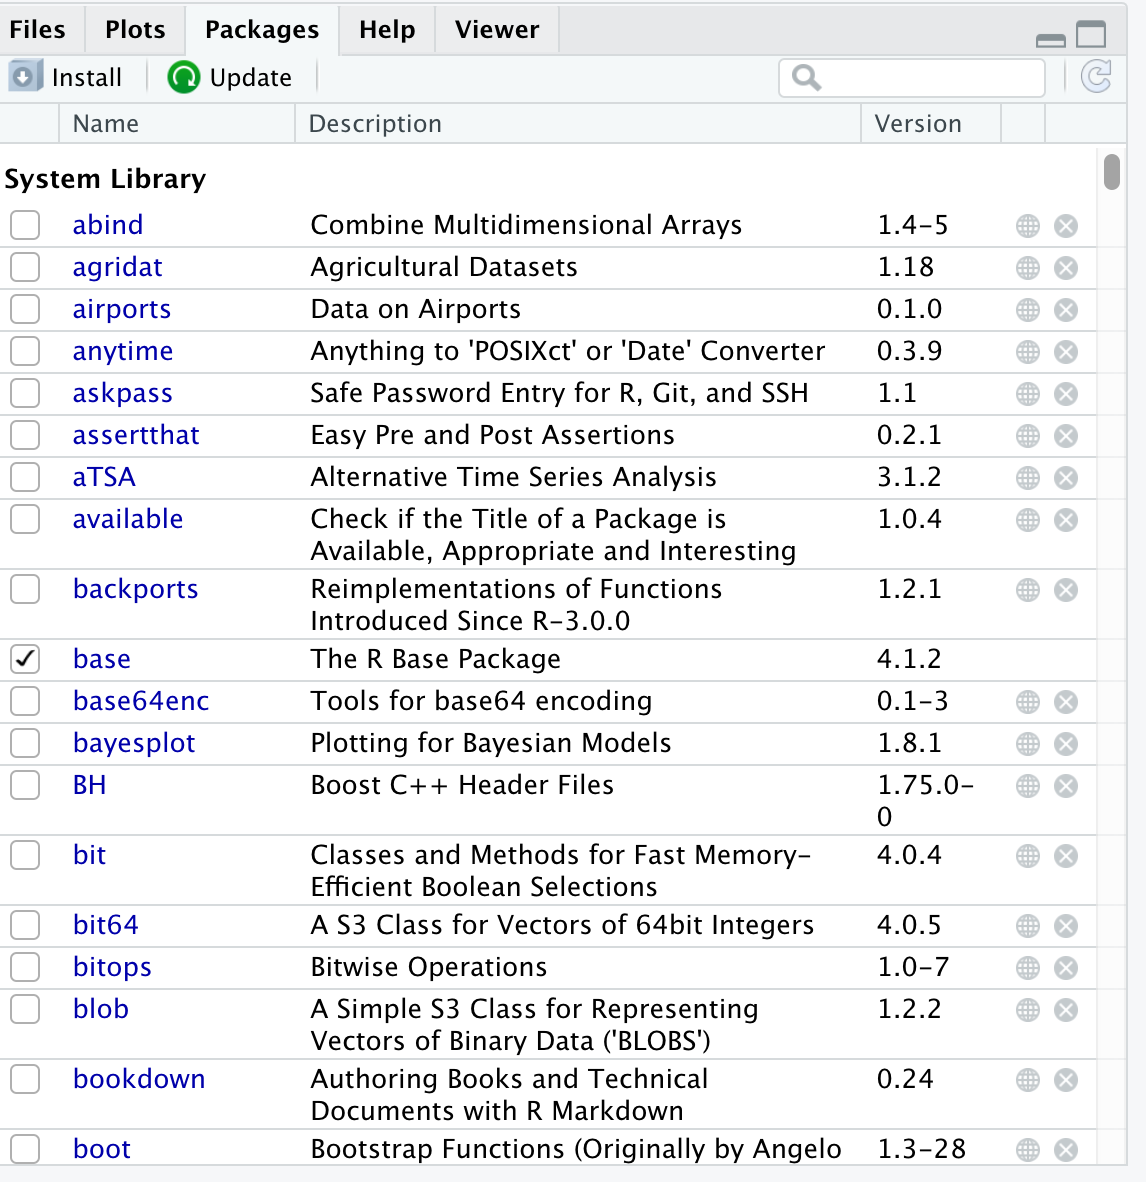
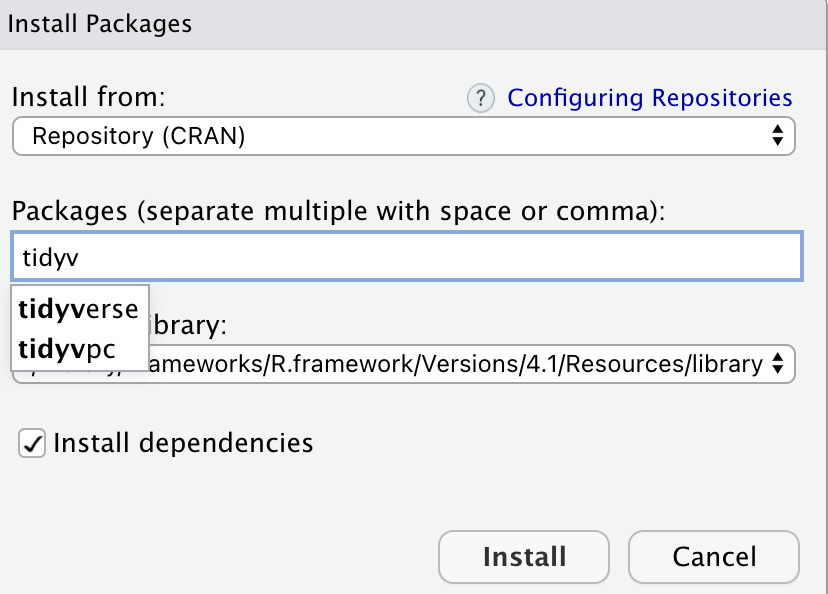
An R package bundles all useful functions, help files, and data sets that help extend the functionality into a package. To start installing the package, navigate to the “Packages” tab in the Output pane. It will show you what packages you currently have. Next, click “Install”, and you should be able to see the pop-up window. Type the package name you want to install in the “Packages” field. You need to make sure that you install all the dependencies by clicking on the box labeled “Install dependencies”. Then click “Install”, you are now ready to start using the new package.
Alternatively, you can install the package by running install.packages("package_name") in the Console pane. The packages only need to be installed once, and install.packages() should not be kept or commented out in the R code.
R, by default, comes bundled with some basic packages that are always loaded, including base (for basic things like + and log()), utils (for utility functions like install.packages()), and stats (for statistical models like lm() and arima()).
Now that you have a package installed, you can bring it to your current working environment by typing library(package_name) in the Console pane. All of the package’s functions, data sets, and help files are now available for you to use until you close your current R session. So, if you have closed it, you will need to load the R packages again.
You should load the packages you used at the top of the R Script. This way, you do not need to remember which packages you need in the script. It is also a good practice to do.
You may have noticed we do not use quotation marks when calling the package in the library function. You have options to use them if you like for this function. However, the quotation marks are necessary for the install.packages function.
It is now your turn to try out the package installation process. What you need to do is to get the palmerpenguins package so we can have a look at the penguin’s data.